Designing Your Perfect Toy Photography Setup

A photographer sets up a highly detailed scene featuring a 1/6 scale figure from Hot Toys. The lighting is perfect, the backdrop is flawless, and the pose is dynamic. But when they snap the photo, the figure's face looks like a flat, lifeless mask because the light is hitting it too directly. This is the difference between a snapshot and a piece of art. This post breaks down how to build a dedicated toy photography setup from the ground, covering lighting, backdrops, and the gear you actually need to make your figures look life-sized.
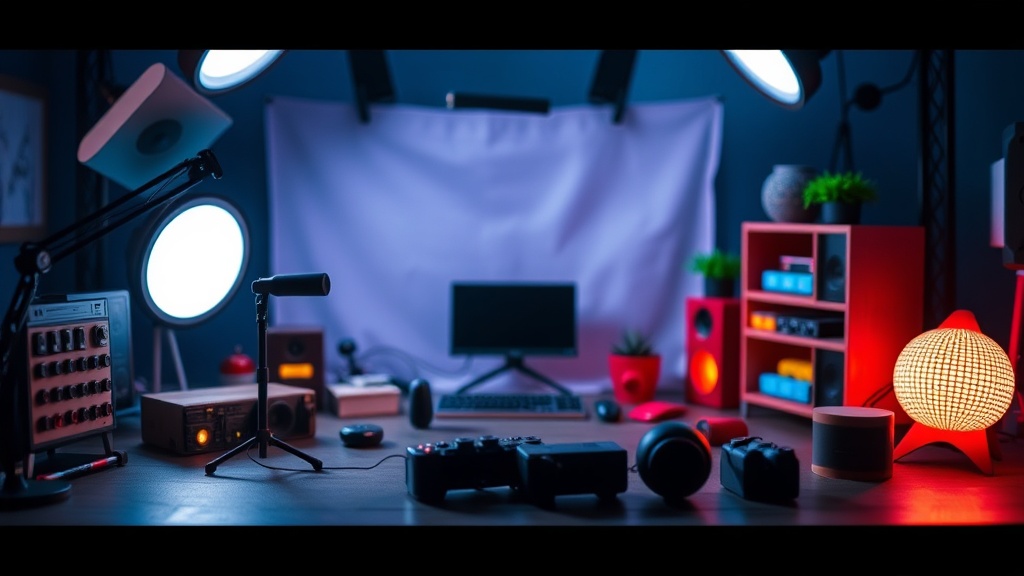
What Equipment Do I Need for Toy Photography?
You need a combination of a stable camera or smartphone, controlled light sources, and a way to hold your figure in place. You don't need a studio-grade DSLR to start, but you do need control over your environment. Most hobbyists begin with what they have, but the goal is to move away from "natural" light and toward "controlled" light.
The foundation of any setup is a tripod. If you're using a phone, a basic GorillaPod works well. If you're using a DSLR, you'll want something more substantial. Shaky hands are the enemy of macro photography—especially when you're trying to capture the texture of a weathered suit on a Marvel Legends figure.
Here is a breakdown of the basic gear categories:
- The Camera: A smartphone with a good macro mode or a mirrorless camera with a dedicated macro lens.
- Lighting: Small LED panels, ring lights, or even desk lamps with diffusers.
- Support: Action stands (the clear plastic kind), museum wax, or blue tack.
- Backdrops: Seamless paper, fabric, or even a simple piece of colored cardstock.
Don't overlook the importance of the stand. If you're photographing a flying figure, you'll need a sturdy wire or a professional action stand. If the stand is too visible, it ruins the illusion. It's a constant battle between stability and invisibility.
How Do I Set Up Lighting for Action Figures?
The best way to set up lighting is to use multiple small, controllable light sources rather than one large, bright light. Most people make the mistake of using the overhead light in their room. That's a recipe for disaster—it creates harsh, unflattering shadows and makes your figures look like plastic toys instead of living characters.
Try the "Three-Point Lighting" method. It's a classic technique used in film and photography. You'll use a Key Light, a Fill Light, and a Back Light (also known as a Rim Light). This adds depth and separates the figure from the background.
The Setup:
- Key Light: This is your primary light source. It should be slightly off-center to create some shape and shadow on the figure's face.
- Fill Light: This is a much softer, dimmer light on the opposite side. It fills in the heavy shadows created by the Key Light so the details aren't lost in total darkness.
- Rim Light: Place this behind the figure. It creates a thin line of light around the edges of the silhouette. This is what makes your figure "pop" against a dark background.
If you're working with a highly reflective figure—think a shiny chrome figure from a
A quick tip: if you're using cheap LED panels, try changing the color temperature. A cool blue light can make a scene feel like a sci-fi movie, while a warm orange light can make a scene feel like a sunset. It's a simple way to change the mood without buying new gear.
What Are the Best Backdrops for Toy Photography?
The best backdrops are those that provide texture and depth without distracting from the figure itself. You can use anything from a piece of black velvet to a printed high-resolution image of a cityscape. The goal is to create a sense of scale.
For many collectors, the "diorama" is the ultimate goal. This involves building a physical environment. However, you don't have to go that far. A simple piece of matte-finish poster board can look incredibly professional if you use the right angles. If the paper is too shiny, the light will bounce off it and reveal the "toy" nature of the shot.
| Backdrop Type | Pros | Cons |
|---|---|---|
| Seamless Paper | Clean, professional, cheap | Can look "flat" if not lit well |
| Fabric/Velvet | Absorbs light, great for dark scenes | Can wrinkle easily |
| Digital/Printed | Infinite variety of scenes | Can look fake if depth of field is wrong |
| Physical Dioramas | Maximum realism and texture | Takes up a lot of space and time |
When using a printed background, be careful with the "depth of field." If your background is a photo of a mountain range, but your figure is in sharp focus and the mountain is also in sharp focus, the illusion breaks. The background must be slightly out of focus to trick the eye into thinking the figure is part of a real-world scale. This is why a high f-stop or a wide aperture is so important.
If you're working with high-end figures, you'll want to ensure your environment matches the quality. For example, if you're photographing a highly detailed Hasbro Star Wars figure, a simple piece of grey cardstock might feel underwhelming. A little bit of "weathering" on your backdrop—like some fake dust or debris—can go a long way. (Just don't use actual dirt if you don't want to ruin your figure's paint job!)
One thing to keep in mind: scale is everything. If your background has a car in it, and that car is the wrong size relative to your 1/12 scale figure, the brain will immediately flag it as a toy. It's often better to use abstract backgrounds—smoke, light flares, or blurred textures—than to use a background with incorrect scale.
If you're worried about your figures looking too "stiff" in these setups, make sure you're checking their articulation. If a joint looks awkward, it'll ruin the shot. You might want to check out my guide on keeping your joints moving to ensure your figures are in peak condition for posing.
The more you practice, the more you'll realize that toy photography isn't about the most expensive camera. It's about how you manipulate light and shadow to tell a story. Start small, experiment with your desk lamp, and see what happens when you change the angle of a single light. It's a massive learning curve, but seeing a 6-inch figure look like a real person is an incredible feeling.
Steps
- 1
Choose Your Environment
- 2
Set Up Your Lighting
- 3
Position the Camera
- 4
Adjust Figure Posing